
Affiliate Disclosure: This article contains affiliate links. If you purchase through these links, we may earn a commission at no additional cost to you. As an Amazon Associate I earn from qualifying purchases.
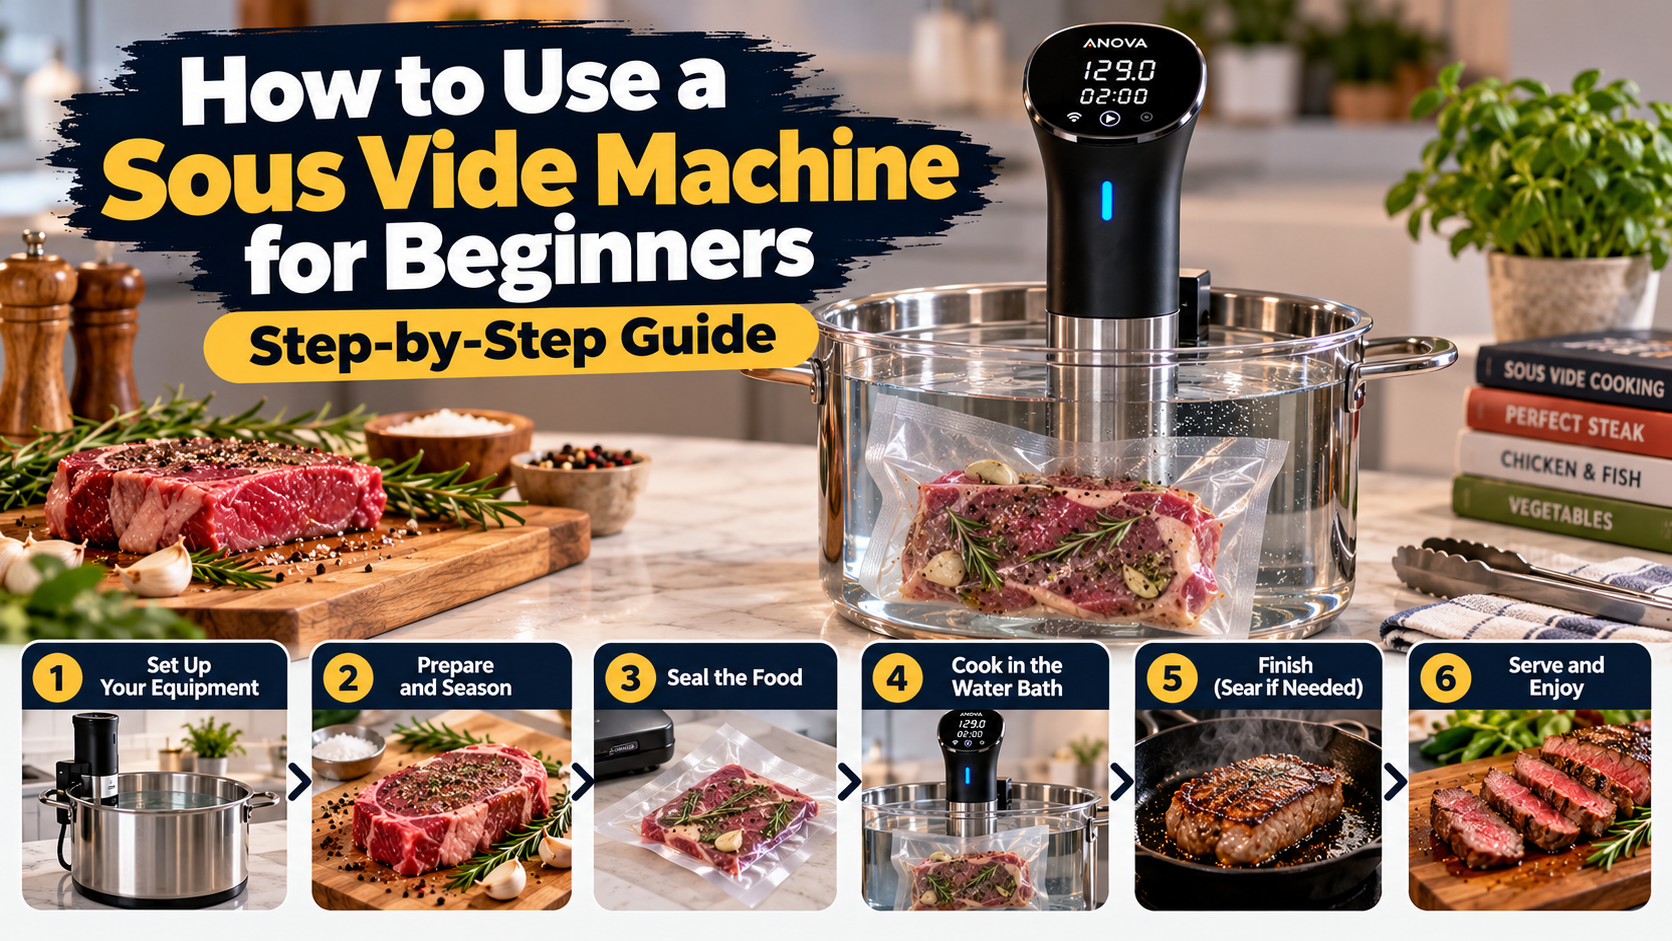
Learning how to use a sous vide machine is easier than it sounds. You fill a suitable container with water, attach an immersion circulator, select the cooking temperature, place properly packaged food into the water bath, and cook it for the time required by a reliable recipe.
The key difference from traditional cooking is precision. Rather than relying on the temperature of a hot pan or oven, a sous vide machine circulates water at a controlled temperature. This can help you achieve more consistent results, especially when cooking foods such as steak, fish, and vegetables.
In this beginner-friendly guide, you will learn what equipment you need, how to set up your first water bath, how to prepare food safely, and which mistakes to avoid.
What Is a Sous Vide Machine?
A sous vide machine, often called an immersion circulator, heats and circulates water to maintain a selected temperature. Food is placed in a suitable sealed bag and submerged in the water bath.
The phrase sous vide is French for “under vacuum,” although a vacuum sealer is not always required for basic home cooking.
Sous vide cooking gives you control over the water temperature, but temperature alone does not determine food safety. The thickness of the food, starting temperature, cooking duration, and handling procedures also matter.
What Do You Need to Start Sous Vide Cooking?
- Sous vide immersion circulator: Heats and circulates the water.
- Suitable pot or container: Holds enough water for the food and circulator.
- Food-safe cooking bags: Use bags specifically suitable for the intended sous vide temperature and duration.
- Food: Start with a beginner-friendly recipe from a reliable source.
- Optional vacuum sealer: Useful for packaging ingredients but not necessary for every recipe.
- Optional clips or weights: Help keep bags submerged.
- Skillet or grill: Useful for browning meat after sous vide cooking.
If you have not chosen a machine yet, read our best sous vide machines for beginners buying guide, where we compare Anova, Breville Joule Turbo, and Greater Goods.
How to Use a Sous Vide Machine: Step by Step
Step 1: Choose a Suitable Container
Start with a sturdy pot or container that is compatible with your immersion circulator. It should be deep enough to keep the water between the machine’s minimum and maximum water-level markings.
Place the container on a stable, heat-resistant surface. Avoid positioning it where steam or prolonged heat could damage cabinets, countertops, or nearby appliances.
You do not necessarily need a dedicated sous vide container. Many beginners start with a large pot they already own.
Step 2: Attach the Sous Vide Machine
Secure the immersion circulator to the side of the container using its clamp or mounting system. Make sure it is stable and that the heating and circulation section will remain properly submerged.
Follow the manufacturer’s instructions for installation, electrical safety, and water levels. Never immerse the machine’s electrical components beyond their rated limits.
Step 3: Fill the Container with Water
Add water until it reaches a level within the manufacturer’s recommended range. Remember that the water level will rise when you add the food bag.
Using moderately warm water may reduce the time required to reach the target temperature, but follow the manufacturer’s recommendations and avoid exceeding the machine’s safe starting-water temperature.
Step 4: Set the Correct Cooking Temperature
Turn on the machine and select the temperature specified by your recipe. Some models allow you to set the temperature directly on the device, while others use a smartphone app.
Important: Do not choose a temperature based only on the texture you want. Use a reliable, food-specific recipe that includes the necessary time and temperature for safe cooking.
For straightforward home cooking, the USDA’s recommended safe minimum internal temperatures include:
| Food | USDA Recommended Minimum Internal Temperature |
|---|---|
| Whole cuts of beef, pork, veal, and lamb | 145°F (63°C), followed by a 3-minute rest |
| Ground meats | 160°F (71°C) |
| Poultry | 165°F (74°C) |
| Fish | 145°F (63°C) |
| Egg dishes | 160°F (71°C) |
These are general USDA safe minimum internal temperatures, not a universal sous vide time-and-temperature chart. Some validated sous vide methods use lower temperatures held for carefully calculated periods, but they require precise control and should not be improvised.
For official guidance, consult the USDA food safety recommendations.
Step 5: Prepare and Season the Food
Prepare the ingredients according to your chosen recipe. You can season meat or vegetables before sealing, but remember that flavors may develop differently inside a closed bag.
Keep raw meat and poultry separate from ready-to-eat ingredients, wash your hands, and clean utensils and work surfaces after contact with raw foods.
Step 6: Place the Food in a Suitable Bag
Place the food in a bag designed for sous vide cooking. Remove excess air so that the food can remain properly submerged and heat can transfer effectively.
You have two common options:
- Vacuum sealing: Use a compatible vacuum sealer and bags approved for the intended cooking conditions.
- Water displacement: For suitable recipes, gradually lower an appropriate resealable bag into water while keeping its opening above the waterline, allowing water pressure to push out excess air before sealing.
Not all household plastic bags are appropriate for heated cooking. Check the bag manufacturer’s temperature and usage guidance.
For help choosing equipment, visit our vacuum sealer buying guide or read how to use a vacuum sealer.
Step 7: Submerge the Bag
When the water bath reaches the recipe’s target temperature, carefully lower the sealed bag into the container.
Make sure the food remains submerged and that the bag does not obstruct the circulator’s water intake or outlet. Use a suitable clip, rack, or weight if necessary.
If the bag floats, check for trapped air and correct the problem before continuing.
Step 8: Cook for the Required Time
Follow the cooking duration specified by your trusted recipe. Thickness, starting temperature, and the type of food all affect the time required.
A sous vide machine maintains the water temperature; it does not instantly bring the center of a thick steak or chicken breast to that temperature.
For this reason, do not assume that the water bath reaching its set temperature means the food is fully cooked or safe to eat.
Check the water level periodically during longer cooks, especially if the container does not have a lid. Add water when necessary, following the manufacturer’s instructions.
Step 9: Remove and Finish the Food
Once the validated cooking time is complete, carefully remove the bag using suitable kitchen tools.
Some foods can be served immediately. For steak and other meats, you may prefer to add a browned crust:
- Remove the cooked meat from its bag.
- Pat the surface thoroughly dry with paper towels.
- Heat a suitable skillet.
- Sear the surface briefly until browned, avoiding unnecessary additional cooking.
- Serve promptly.
Sous vide cooking controls the internal cooking process, while searing creates the browned exterior many people enjoy.
Step 10: Serve or Cool the Food Safely
Serve the food promptly after cooking. If you plan to store it instead, follow validated rapid-chilling procedures rather than allowing the sealed bag to cool slowly at room temperature.
Reduced-oxygen packaging requires special attention to temperature control and refrigeration. Do not assume vacuum-sealed sous vide food is shelf-stable or safe for extended storage.
How Long Does Sous Vide Cooking Take?
There is no single cooking time that works for every ingredient. The correct duration depends on:
- Food type and thickness.
- Whether the food starts refrigerated or frozen.
- The selected water temperature.
- The time needed for the center to heat.
- Any additional holding time needed for food safety.
- The desired texture.
Always use a tested recipe or validated time-and-temperature guide for the specific food. A timer is useful, but it cannot replace appropriate cooking instructions.
Do You Need a Vacuum Sealer for Sous Vide?
No, not for every recipe. Many home cooks use the water-displacement method with appropriate food-safe bags for simple preparations.
A vacuum sealer can still be useful if you frequently cook sous vide, prepare ingredients in advance, or want a convenient way to package portions.
Our guide to vacuum sealers vs. freezer bags explains the practical differences.
Common Sous Vide Mistakes to Avoid
Using an Unverified Time and Temperature
A temperature setting that produces a preferred texture is not automatically a safe cooking method. Use food-specific, validated instructions.
Allowing the Food Bag to Float
Food that is not fully surrounded by circulating water may cook unevenly. Remove trapped air and keep the bag submerged.
Using the Wrong Type of Bag
Some bags are intended only for storage. Choose packaging rated for the temperature and duration of the cook.
Overcrowding the Water Bath
Too many bags can restrict water circulation. Leave enough space for water to move around the food.
Ignoring Water Evaporation
During longer cooks, evaporation can lower the water level. A compatible lid or cover may help, but always monitor the bath as recommended by the manufacturer.
Skipping Food-Safety Procedures
Proper handling before cooking and safe cooling afterward are essential. Vacuum sealing does not eliminate harmful bacteria or make food shelf-stable.
Which Sous Vide Machine Is Easiest for Beginners?
Compare features and controls in our best sous vide machines for beginners buying guide. For an alternative cooking method, see sous vide vs slow cooker.
The best machine depends on how you prefer to control your cooking.
Anova Precision Cooker 3.0
A strong option if you want built-in controls along with Wi-Fi features.
Check Anova Precision Cooker 3.0 on Amazon
Breville Joule Turbo
Worth considering if you prefer an app-guided cooking experience and compatible Turbo cooking features.
Check Breville Joule Turbo on Amazon
Greater Goods Sous Vide Cooker
A practical choice if you prefer simple physical controls without depending on Wi-Fi or a smartphone.
Check Greater Goods Sous Vide Cooker on Amazon
For a detailed feature comparison, see our complete best sous vide machines for beginners guide.
Frequently Asked Questions
Can beginners use a sous vide machine?
Yes. Most immersion circulators are relatively simple to set up. The most important beginner skills are choosing a suitable container, keeping the bag submerged, and following safe time-and-temperature instructions.
Can you sous vide in a regular pot?
Yes, if the pot is compatible with the circulator, deep enough for its water-level requirements, and safe for prolonged heating.
Can you put frozen food directly into a sous vide bath?
Some validated recipes allow cooking from frozen, but additional heating time is usually needed. Follow a recipe specifically designed for the ingredient, thickness, and frozen starting condition.
Do you need to sear meat after sous vide?
Searing is optional, but it creates browning and flavor that a water bath does not provide. It should not be treated as a substitute for following a safe sous vide cooking procedure.
Can sous vide food stay in the bag after cooking?
Yes, but safe handling and storage are essential. Serve promptly or use an appropriate rapid-chilling process before refrigeration. Do not leave cooked food at room temperature for extended periods.
Does sous vide cooking use a lot of electricity?
Energy consumption varies with heating power, water volume, cooking duration, insulation, and room conditions. Once the water reaches its target temperature, the heater generally cycles as needed to maintain it.
Final Thoughts
Learning how to use a sous vide machine starts with a few simple habits: choose a compatible container, set up the circulator correctly, use appropriate cooking bags, and follow a reliable recipe with safe time-and-temperature instructions.
As you gain experience, you can experiment with different ingredients and finishing techniques. The goal is not to make cooking complicated, but to use controlled water temperature as another useful tool in your kitchen.
Still choosing your first machine? Visit our beginner’s sous vide machine comparison to explore three options and find one that fits your cooking style.
1 thought on “How to Use a Sous Vide Machine for Beginners: Step-by-Step Guide”